You just finished making a creamy buttercup squash soup or a roasted squash side dish. The flesh is gone, and you're left with a slimy, seed-filled cavity. Most people scrape it straight into the compost bin. That's a mistake I've made too many times. Those slippery, wet seeds are a hidden treasure, waiting to be transformed into one of the most satisfying, crunchy snacks you can make at home. Roasting buttercup squash seeds isn't just about reducing food waste (though that's a great bonus); it's about unlocking a flavor and texture that store-bought pumpkin seeds often lack—richer, nuttier, and more substantial.
What's Inside This Guide
Why Buttercup Squash Seeds Are Worth Your Time
Let's clear something up first. All winter squash seeds are edible, but they're not all created equal. Buttercup squash seeds have a particular appeal. Compared to the flatter, wider seeds from a carving pumpkin, buttercup seeds are plumper and have more meat to them. They roast up with a fantastic crunch that holds up well to bold seasonings.
Nutritionally, they're a powerhouse. They're packed with magnesium, which is crucial for muscle and nerve function, and a good source of zinc and iron. They also contain healthy fats and protein, making them a far more sustaining snack than a bag of chips. According to the USDA FoodData Central, pumpkin and squash seeds are a concentrated source of several key minerals. Think of them as a free nutritional supplement that comes with your squash.
Pro Tip Most Guides Miss: The flavor of the seed is subtly influenced by the squash itself. Buttercup squash has a sweet, dense flesh, and that mild sweetness seems to carry over into the seed, giving you a fantastic base flavor before you even add salt.
From Squash to Sheet Pan: The Key Steps
This is where most people get frustrated and give up. The slime. It's tenacious. But skipping or rushing the cleaning step is the number one reason homemade roasted seeds turn out chewy or taste off.
Cleaning: Conquering the Slime
Don't just rinse them under water in a colander. You'll be there forever. Here's the method that changed everything for me:
- Scrape & Separate: Use your hands or a spoon to scrape all the seeds and stringy pulp into a large bowl.
- The Water Bath: Fill the bowl with warm (not hot) water. The warmth helps loosen the pulp.
- The Secret Weapon – Coarse Salt: Sprinkle in a tablespoon of coarse kosher salt or sea salt. The abrasive crystals act as a scouring agent. Now, get your hands in there and massage the seeds vigorously for a minute or two. You'll feel the slimy coating start to release.
- Float & Skim: The clean seeds will sink, and most of the pulp will float. Skim off the floating debris with your hands.
- The Final Rinse: Pour the contents into a fine-mesh strainer. Rinse under cool water, using your fingers to rub any remaining bits off the seeds. You want them to feel clean and slightly rough, not slick.
Drying: The Non-Negotiable Step
This is critical. Any surface water will steam the seeds instead of roasting them. You have two good options:
- Pat Dry & Air Dry: Spread the seeds in a single layer on a clean kitchen towel or several layers of paper towels. Pat them top-down with another towel. Then, let them air dry for at least an hour, or even overnight. This is the best method.

- Quick Towel Dry: If you're impatient, roll them around in a dry towel aggressively. Then, spread them on a sheet pan and let them sit near a warm oven for 20 minutes. They must be bone-dry to the touch.
Seasoning Ideas: From Classic to Creative
Now for the fun part. Your dry seeds are a blank canvas. Toss them in a medium bowl with just enough oil to coat them lightly—about a teaspoon to a tablespoon for seeds from one medium squash. I prefer avocado oil for its high smoke point and neutral flavor, but olive oil works too.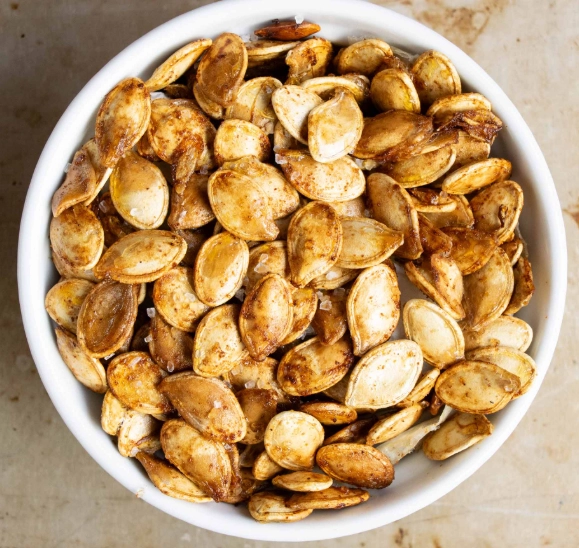
Then, add your seasonings. Here’s a quick-reference table for flavor inspiration:
| Flavor Profile | Seasoning Combination (for seeds of 1 squash) | Best For |
|---|---|---|
| The Classic | 1 tsp sea salt + 1/2 tsp garlic powder + 1/4 tsp black pepper | An all-purpose, crowd-pleasing snack. |
| Smoky & Spicy | 3/4 tsp smoked paprika + 1/2 tsp chili powder + 1/4 tsp cayenne (optional) + 1 tsp salt | Adding kick to soups, salads, or eating by the handful. |
| Sweet & Savory | 1 tbsp maple syrup or honey + 1 tsp oil + 1/2 tsp cinnamon + 1/4 tsp salt (Watch carefully, sugars burn faster!) | A fall-themed treat, perfect on yogurt or oatmeal. |
| Umami Bomb | 1 tbsp nutritional yeast + 1 tsp tamari or soy sauce (reduce salt) + 1/2 tsp onion powder | A cheesy, savory flavor without dairy. |
| Everything Bagel | 2 tsp everything bagel seasoning + 1/2 tsp salt | The ultimate easy, flavorful topping. |
Mix thoroughly so every seed gets some love.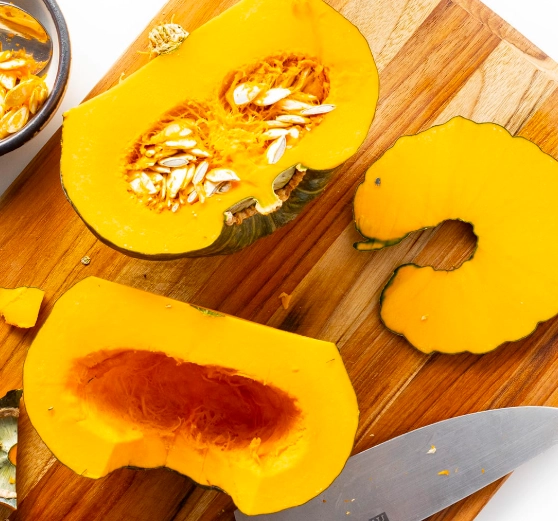
The Roasting Technique: Low & Slow Wins
High heat is the enemy here. It burns the outside before the inside dries and crisps. You want to evaporate all the internal moisture.
- Preheat & Prep: Preheat your oven to 325°F (160°C). This is lower than many recipes suggest. Line a rimmed baking sheet with parchment paper for easy cleanup.
- Spread in a Single Layer: Pour the seasoned seeds onto the sheet. Spread them out. No piles. They need space for air to circulate.
- Roast with Patience: Roast for 20-25 minutes. Here’s the key: you need to stir or shake the pan every 8-10 minutes. This ensures even browning and prevents hot spots from burning them.
- The Doneness Test: They won't get fully crisp in the oven. They'll crisp up as they cool. Look for a light golden brown color and a nutty aroma. Take one out, let it cool for a minute, then test the crunch.
- Cool Completely: This is the final crisping phase. Transfer the seeds on the parchment to a cooling rack. Don't cover them. Let them cool to room temperature. This can take 30 minutes. Now taste. That's the real texture.
Storing Your Roasted Seeds
If they last that long. For maximum crunch, store them in an airtight container or jar at room temperature for up to a week. For longer storage (up to a month), keep them in the fridge. You can also freeze them for several months in a freezer bag. No need to thaw, just sprinkle frozen on soups or salads.
Use them everywhere: on soups instead of croutons, on salads for crunch, blended into homemade trail mix, or simply as a desk snack to avoid the afternoon vending machine run.
Reader Comments