You've planted your bell pepper seeds with care, kept the soil moist, and now you're staring at the potting mix, willing something to happen. Then, a tiny green loop emerges. Is that it? Is that your pepper? Or is it a weed that just happened to sprout in your precious seed tray? I've been there. In my first year gardening, I celebrated what I thought were pepper seedlings for a week before realizing they were just common chickweed. Let's make sure that doesn't happen to you.
When a bell pepper plant starts its life, it follows a very specific, recognizable pattern. Knowing exactly what to look for in those first 2-4 weeks is the difference between nurturing a champion plant and accidentally weeding out your future harvest. This guide will walk you through every stage, with a focus on the visual details most blogs gloss over.
What You'll Learn in This Guide
Stage 1: The First Sign of Life – Germination (Days 7-14)
Bell pepper seeds are notoriously slow starters compared to, say, lettuce or radishes. Don't panic if you don't see anything for 10 days, especially if your soil is on the cooler side. Optimal soil temperature is between 75-85°F (24-29°C).
The very first thing you'll see is not a leaf. It's a hypocotyl arch. This is a pale green or white curved stem that pushes up through the soil, looking like a tiny shepherd's crook. The seed coat is often still attached to the tip. This arch straightens out over the next 12-24 hours, pulling the seed leaves (cotyledons) up and out of the soil.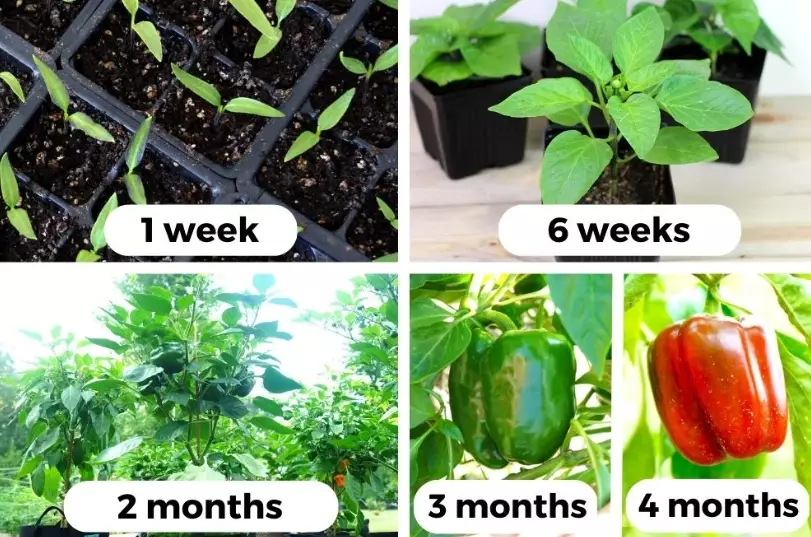
Key Features of a Young Bell Pepper Plant
Once the seed leaves are free, you can start identifying your plant with confidence. Here’s the anatomy of a true bell pepper seedling.
The First Leaves (Cotyledons)
These are not true leaves. They're the plant's packed lunch, formed inside the seed. For bell peppers:
- Shape: Oval, smooth-edged, and slightly fleshy. They are broader than they are long.
- Size: Each is about 1/4 to 1/2 inch long initially.
- Color: A vibrant, uniform green. They should look plump and healthy, not yellow or pale.
- Arrangement: They appear as a pair, directly opposite each other on the short stem.
Many gardeners obsess over the cotyledons, but here's the non-consensus tip from years of growing: their primary job is to fuel the growth of the first true leaf. Once that true leaf is photosynthesizing well, the cotyledons will yellow and fall off. Don't stress when they do—it's normal.
The True Leaves Emerge (Weeks 2-3)
This is the confirmation you've been waiting for. The first true leaves will sprout from the point between the two cotyledons.
- Shape: Distinctly pointed, with a smooth or very slightly wavy margin. They are longer than they are wide.
- Texture: They feel softer and thinner than the waxy, mature leaves you're used to, but you can already feel a slight firmness.
- Color: A bright, slightly lighter green than the cotyledons.
- Arrangement: They will grow alternately on the stem, not opposite like the cotyledons. The second true leaf will grow slightly higher up and on the other side of the stem from the first.
The Stem and Overall Posture
A healthy bell pepper seedling has a short, sturdy, and slightly hairy stem. The hairs are very fine, almost fuzzy. The stem should be green, sometimes with a faint purple tinge near the base (this is more common in purple or dark-fruited varieties and is not a cause for concern). A weak, thin, and overly elongated ("leggy") stem is a sign of insufficient light.
Pro Tip: Gently brush your finger against the stem of a suspected pepper seedling. That faint fuzziness is a good clue. Many common weeds have perfectly smooth stems.
The Ultimate Showdown: Bell Pepper Seedling vs. Common Weed
This is where most confusion happens. Let's compare side-by-side. I've pulled this table together based on pulling thousands of unwanted plants from my own garden beds.
| Feature | Bell Pepper Seedling | Common Impostors (e.g., Lamb's Quarters, Hairy Bittercress) |
|---|---|---|
| First Leaves (Cotyledons) | Pair of smooth, oval, fleshy leaves. Uniform green. | Often narrow, lance-shaped, or asymmetrical. May be a different shade of green (sometimes bluish). |
| First True Leaves | Pointed, smooth-edged, growing alternately. Uniform color. | May be toothed, lobed, rounded, or in a rosette pattern. Often appear in multiples quickly. |
| Stem | Short, stout, often has fine hairs. Green, sometimes with purple tinge. | Often very thin, elongated, and smooth. Can be reddish or a different color from the pepper stem. |
| Smell | Crush a leaf very gently. A faint, fresh, almost "green pepper" scent may be detectable. | Weeds often have a distinct, sometimes pungent or grassy smell. Lamb's quarters has a mealy odor. |
| Growth Pattern | Grows relatively slowly and deliberately in the early weeks. | Many weeds grow alarmingly fast once they sprout, trying to outcompete. |
When in doubt, wait a few days. The true leaves are the ultimate giveaway. If you're still unsure, let it grow in a separate pot. A weed will reveal itself quickly.
3 Early Care Mistakes That Stunt Your Pepper's Growth
Identifying your seedling is step one. Not killing it with kindness is step two. Here are the big three errors I see every season.
1. The "Drowning Love" Watering Schedule
Seedlings need consistent moisture, not a swamp. Soggy soil is the fast track to damping-off disease, a fungal issue that makes the stem rot at the soil line. The plant topples over and dies. It's heartbreaking.
Do this instead: Water from the bottom. Place your seed tray in a shallow dish of water and let the soil wick it up for 15-20 minutes. Then remove it. This encourages deep root growth and keeps the stem dry. Let the soil surface dry slightly between waterings.
2. The "Dimly Lit Apartment" Problem
A windowsill is rarely enough light, even a south-facing one. Seedlings stretch desperately towards the light, becoming weak and leggy. They'll never recover their full potential.
Do this instead: Use a grow light. Keep it just 2-4 inches above the seedlings for 14-16 hours a day. A simple LED shop light works wonders. Your seedlings will be compact, dark green, and sturdy.
3. The "Buffet Before They're Hungry" Fertilizer Fiasco
Those cotyledons contain all the nutrients the seedling needs for the first few weeks. Adding liquid fertilizer too early burns the delicate roots.
Do this instead: Wait until you see at least 2-3 sets of true leaves. Then, use a very diluted (1/4 strength) balanced liquid fertilizer. According to the University of California's Integrated Pest Management program, over-fertilization is a leading cause of seedling stress and disease susceptibility.
Watch Out: If you bought a commercial seed-starting mix, it often contains a small amount of fertilizer. Check the bag. If it says "feeds for 3 months," you don't need to add anything at all until you transplant.
From Sprout to Sturdy Plant: Your Visual 8-Week Timeline
Here’s what to expect as your bell pepper plant grows from a fragile sprout into a transplant-ready powerhouse.
- Week 1-2: Hypocotyl arch emerges, straightens. Cotyledons open. Focus is on root development below the soil.
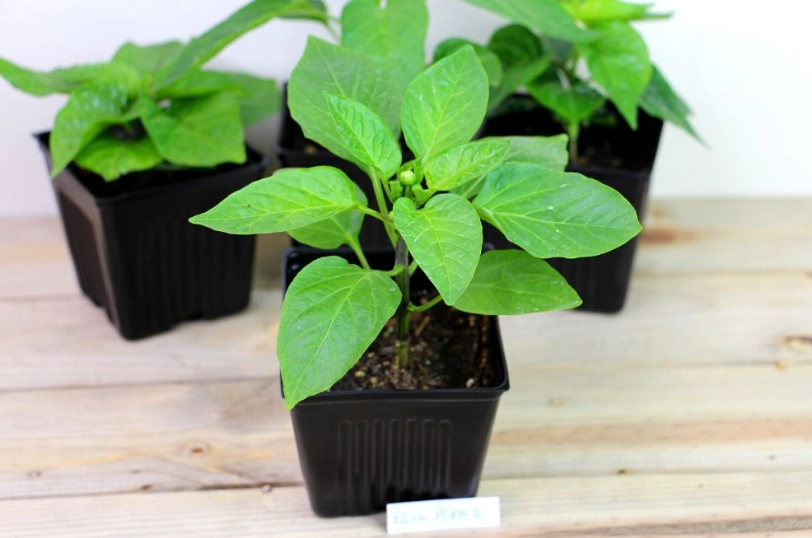
- Week 3-4: First and second true leaves appear. Stem thickens slightly. Plant is about 1-2 inches tall.
- Week 5-6: Third and fourth true leaf sets form. Plant begins to look bushy. You might see side branches starting in the "axils" (where leaves meet the stem). Height: 3-4 inches.
- Week 7-8: Plant is robust, with 6-8 true leaves. Stem is woody at the base. It's now ready to be "hardened off" (acclimated to outdoor conditions) and transplanted into the garden after all danger of frost has passed.
Your Bell Pepper Seedling Questions, Answered
Why are my bell pepper seedlings so leggy and falling over?
This is almost always insufficient light. They're stretching to find it. If they're already leggy, you can carefully transplant them deeper when you pot them up. Bury the stem up to the cotyledons—it will grow new roots along the buried portion. But fix the light source first, or it will just happen again.
The edges of my pepper seedling's leaves are turning brown and crispy. What's wrong?
This is often fertilizer burn or sun scald. If you've fertilized, flush the soil with plain water. If they're under a strong light, make sure it's not too close and generating excess heat. Also, check your watering—inconsistent moisture (very dry, then soaked) can cause leaf tip burn.
 How can I tell if my seedling is a green, red, yellow, or purple bell pepper variety at this stage?
You usually can't. The foliage of most Capsicum annuum (bell pepper) varieties looks identical when young. The purple tinge on the stem is sometimes more pronounced in dark-fruited types, but it's not a reliable indicator. The fruit color is determined by genetics and ripening, not the seedling leaves. You'll have to trust your seed packet or plant tag on this one.
When is the absolute earliest I can transplant my seedlings outside?
Not by the calendar, but by the soil temperature. Bell peppers are tropical plants and hate cold feet. Wait until nighttime temperatures are consistently above 55°F (13°C) and soil temperature is at least 65°F (18°C). Transplanting into cold soil will shock them, causing them to sit and sulk for weeks, stunting your entire season. A soil thermometer is a better investment than an early transplant.
Spotting those first true leaves on a bell pepper seedling you started from seed is one of gardening's great little victories. It's the moment you know you're on your way to a homegrown harvest. By knowing exactly what to look for—the smooth cotyledons, the pointed true leaves, the fuzzy stem—you can weed out the impostors and give your real peppers the focused care they need to thrive. Now go check on those seedlings. Your future summer salads are counting on you.
Reader Comments